
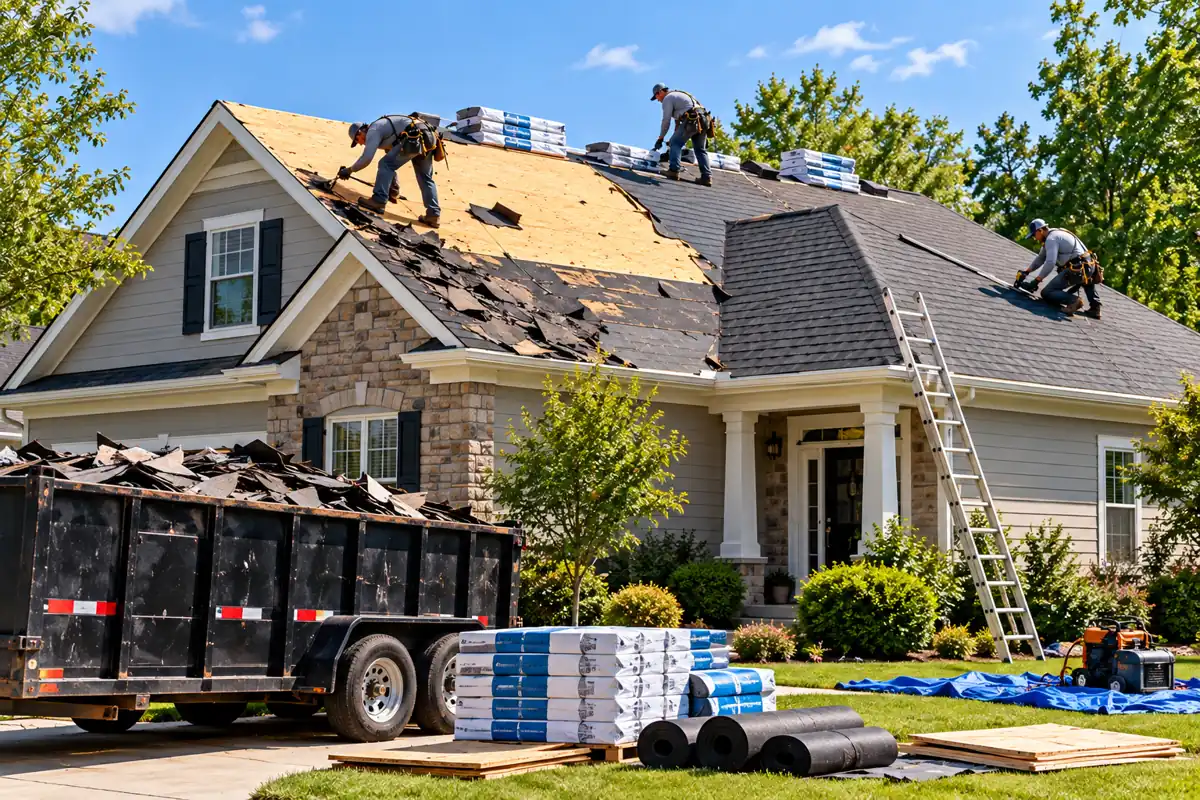
What Happens During a Roof Replacement? A Step-by-Step Homeowner Guide
Replacing your roof is a major home improvement project, and if you've never been through the process before, it's natural to have questions.
What happens when the roofing crew arrives? Will they remove all the old shingles? What if they discover damaged wood underneath? Can you stay inside your home? And how do you know the new roof has been installed correctly?
A typical residential roof replacement involves preparing the property, removing the existing roofing materials, inspecting the roof deck, installing the new roofing system, cleaning up, and completing a final inspection.
Although the exact process depends on your roof's condition, materials, and design, understanding these steps can help you feel more prepared and make informed decisions throughout the project.
At 5 Star Roofing & Restoration, we help homeowners throughout Greensboro, Winston-Salem, High Point, and surrounding communities understand their roofing options. Our Piedmont Triad roofing services include residential roof inspections, repairs, replacements, and storm-damage assessments.
This guide explains what happens before, during, and after a roof replacement, including what homeowners should expect at every stage.
Roof Replacement Process at a Glance
A complete asphalt-shingle roof replacement typically follows these steps:
- Step 1: Initial roof inspection and assessment.
- Step 2: Written estimate, material selection, and scheduling.
- Step 3: Property preparation and delivery of materials.
- Step 4: Protection of landscaping and surrounding areas.
- Step 5: Removal of old roofing materials.
- Step 6: Roof decking inspection and necessary repairs.
- Step 7: Installation of underlayment and water-protection components.
- Step 8: Installation of starter shingles, flashing, and new shingles.
- Step 9: Installation of ridge caps and ventilation components.
- Step 10: Cleanup, final inspection, and project closeout.
Many straightforward asphalt-shingle roof replacements can be completed in approximately one to three working days once installation begins. Larger or more complicated projects may take longer.
The process should prioritize safe working conditions, correct installation, and compliance with applicable manufacturer instructions rather than speed alone.
Step 1: Initial Roof Inspection and Assessment
Before recommending a roof replacement, a roofing contractor should evaluate the condition of the existing roofing system.
This inspection helps identify visible damage, determine whether replacement is necessary, and establish the scope of work.
What Does a Roofing Contractor Inspect?
Depending on accessibility and the property, the inspection may include:
- Existing shingle condition.
- Missing, cracked, curling, or deteriorated shingles.
- Flashing around chimneys, vents, skylights, and walls.
- Roof valleys and other drainage areas.
- Signs of storm damage.
- Visible moisture intrusion.
- Accessible attic conditions.
- Existing ventilation.
- Potential decking concerns.
- Roof dimensions and installation complexity.
The contractor should explain any significant findings and, where practical, provide photographs.
Does Every Roof Inspection Lead to Replacement?
No. A complete replacement isn't always necessary.
If damage is isolated and the remaining roofing system is in serviceable condition, targeted repairs may be sufficient.
However, widespread deterioration, recurring leaks, or extensive damage may make replacement more practical.
For additional guidance, read our article on whether to repair or replace an asphalt-shingle roof.
Homeowner tip: Ask your contractor to explain why replacement is recommended and whether other reasonable options exist.
Step 2: Roofing Estimate, Material Selection, and Scheduling
Once the inspection is complete, the contractor prepares a written estimate describing the proposed work.
This document should explain what you're paying for and what the roofing crew will install.
What Should a Roof Replacement Estimate Include?
A detailed proposal should address:
- Roofing manufacturer and selected product.
- Roof measurements or material quantities.
- Removal and disposal of existing materials.
- Underlayment and water-protection components.
- Drip edge and roof-edge details.
- Flashing installation or replacement.
- Starter shingles and ridge caps.
- Attic ventilation components.
- Decking repair allowances.
- Property protection and cleanup.
- Applicable permit responsibilities.
- Warranty coverage.
- Payment terms.
- Procedures for additional work.
Not every project requires the same components or corrective work. The estimate should reflect the specific property.
Choosing Your Roofing Material
Many North Carolina homeowners choose architectural asphalt shingles because they are widely available and offer a balance of appearance, cost, and performance.
Other options may include impact-resistant shingles and metal roofing.
When comparing products, consider:
- Initial installed cost.
- Product appearance and available colors.
- Roof pitch compatibility.
- Manufacturer installation requirements.
- Expected maintenance.
- Warranty terms and exclusions.
- Suitability for your home's design.
Your contractor should explain the advantages and limitations of each option.
Scheduling the Installation
Before installation, confirm:
- The anticipated start date.
- Expected project duration.
- Material delivery arrangements.
- Property access requirements.
- Weather-delay procedures.
- The main project contact.
- Any necessary approvals or permits.
The installation date may depend on weather, material availability, and the contractor's schedule.
Step 3: Preparing Your Home Before Roof Replacement
Preparing your property before the crew arrives can make the installation process smoother.
Roof replacement involves workers, equipment, falling debris, and significant noise.
What Should Homeowners Do Before Installation Day?
- Move vehicles away from the house and designated work areas.
- Clear access to the driveway.
- Relocate patio furniture and outdoor decorations.
- Remove fragile items near the house.
- Secure wall decorations that may be affected by vibration.
- Protect valuable landscaping where practical.
- Keep children and pets away from construction areas.
- Notify household members about the expected noise.
- Discuss special accessibility needs with the contractor.
- Confirm where materials and disposal containers will be placed.
If you work remotely, consider scheduling important calls away from the house during the loudest installation periods.
Should You Cover Items in the Attic?
Roof replacement may create dust or debris in attic spaces, particularly when the roof decking is disturbed.
If you store belongings in an unfinished attic, consider covering them with protective sheeting or relocating delicate items.
Ask the contractor whether attic access or preparation is necessary.
Step 4: Protecting Landscaping and Surrounding Property
Before removing roofing materials, the crew should prepare the work area.
Property protection methods depend on the home's layout, landscaping, access, and project scope.
Common Property Protection Measures
These may include:
- Positioning debris containers.
- Protecting vulnerable landscaping.
- Moving or covering outdoor belongings.
- Establishing safe access routes.
- Identifying electrical lines and other hazards.
- Setting up ladders and equipment.
- Establishing restricted work areas.
Some roofing materials and debris can fall during tear-off.
Homeowners should avoid walking beneath active roof work.
Important: No protection system can eliminate every risk. Discuss particularly valuable plants, delicate exterior features, or access concerns before installation begins.
Step 5: Removing the Old Roofing Materials
The next major stage is removing the existing roofing materials.
This process is commonly called a roof tear-off.
During a complete tear-off replacement, the crew removes the existing roof covering so the underlying roof deck can be inspected and prepared.
Why Remove the Existing Shingles?
Removing the old roof covering can provide several benefits:
- Allows inspection of the underlying decking.
- Helps identify concealed moisture damage.
- Provides a suitable surface for the new roofing system.
- Allows correction of certain existing installation problems.
- Avoids adding another layer of roofing material.
A complete tear-off is generally preferred when underlying conditions need to be evaluated or when required by the selected roofing system or applicable rules.
What Happens to the Old Shingles?
Discarded roofing materials are typically collected and placed into a disposal container or trailer.
The contractor should explain how removal, hauling, and disposal are handled.
Is Roof Tear-Off Noisy?
Yes. Removing shingles and fasteners can create substantial noise.
Homeowners may hear scraping, hammering, equipment movement, and debris entering disposal containers.
The noise is temporary, but it can be disruptive for people working or resting inside the home.
Step 6: Inspecting and Repairing the Roof Deck
After the existing roofing materials are removed, the roof deck becomes accessible.
The roof deck is the structural surface supporting the roofing system. Common residential decking materials include plywood and oriented strand board, often called OSB.
What Is the Contractor Looking For?
The crew may identify:
- Water-damaged wood.
- Deteriorated decking.
- Loose or unsuitable panels.
- Damaged areas around roof penetrations.
- Previous repair problems.
- Conditions that could interfere with proper installation.
What Happens If Damaged Decking Is Found?
Damaged decking may need to be replaced before the new roofing materials are installed.
The contractor should document the problem and explain the required work.
Because some damage may be concealed, the final scope can change after tear-off.
Can Decking Repairs Increase the Cost?
Yes. Additional decking replacement may increase the project cost.
Before installation begins, ask:
- Is any decking replacement included in the estimate?
- How is additional decking priced?
- Will photographs be provided?
- Is homeowner approval required for additional work?
- Could the repairs extend the installation schedule?
A clear change-order process helps prevent misunderstandings.
Step 7: Installing Underlayment and Water Protection
Once the roof deck is ready, the roofing crew installs the specified water-protection components.
These materials form part of the complete roofing system.
What Is Roof Underlayment?
Underlayment is a material installed over the roof deck and beneath the primary roofing material.
It provides a secondary layer of protection.
Common types include:
- Synthetic underlayment.
- Asphalt-saturated felt.
- Self-adhering water-protection membranes for specified applications.
The correct materials depend on the roof design, selected roofing system, applicable requirements, and manufacturer instructions.
Why Are Roof Valleys and Penetrations Important?
Roof valleys and penetrations can experience concentrated water flow or require additional waterproofing details.
The contractor should use appropriate materials and installation methods at these locations.
What About Drip Edge?
Drip edge is a metal flashing component installed along designated roof edges.
It helps direct water away from vulnerable edge areas and into the intended drainage path.
Installation details should follow applicable requirements and manufacturer instructions.
Step 8: Installing Starter Shingles, Flashing, and New Shingles
With the roof deck and underlayment prepared, the crew begins installing the primary roofing materials.
For an asphalt-shingle roof, this typically involves starter materials, field shingles, flashing details, and other system components.
Starter Shingles
Starter shingles are installed at designated roof edges according to the selected roofing system.
They help establish the first course and provide specified edge protection.
Field Shingles
Field shingles cover the main roof surfaces.
They must be installed using the correct layout, fastening methods, exposure, and other manufacturer requirements.
The crew works systematically across the roof to complete each section.
Flashing Installation
Flashing helps manage water around roof openings and intersections.
Common locations include:
- Chimneys.
- Plumbing vents.
- Skylights.
- Roof valleys.
- Sidewalls.
- Dormers.
- Roof-to-wall connections.
Incorrect flashing installation can contribute to future leaks, even when the shingles themselves are in good condition.
Why Installation Details Matter
A new roof's performance depends on more than the visible shingles.
Proper fastening, flashing, ventilation, and compatibility between roofing components are essential.
Ask your contractor which roofing system is being installed and what manufacturer requirements apply.
Step 9: Installing Ridge Caps and Ventilation Components
As installation progresses, the crew completes roof ridges, hips, and applicable ventilation details.
What Are Ridge Caps?
Ridge caps are roofing components designed to cover roof ridges and certain other intersections.
They provide a finished appearance and help protect these areas.
What Is a Ridge Vent?
A ridge vent is one type of attic exhaust ventilation installed near the roof ridge.
Not every roof requires a ridge vent, and ventilation designs differ by property.
Why Does Attic Ventilation Matter?
Appropriate attic ventilation can help manage heat and moisture conditions in certain roof assemblies.
The correct ventilation approach depends on:
- Attic design.
- Existing intake and exhaust openings.
- Roof construction.
- Applicable building requirements.
- Roofing manufacturer instructions.
A contractor should evaluate the existing conditions before recommending changes.
Step 10: Roof Cleanup and Final Inspection
After the new roofing system is installed, the contractor completes the agreed cleanup and inspection process.
What Should Cleanup Include?
Depending on the contract, cleanup may include:
- Removing discarded roofing materials.
- Collecting accessible debris.
- Using magnetic equipment to collect accessible nails.
- Removing leftover materials.
- Clearing designated work areas.
- Inspecting landscaping and access routes.
- Removing temporary equipment.
Magnetic nail collection can help reduce leftover fasteners, but it cannot guarantee that every nail will be recovered.
Continue exercising caution around the property after installation.
What Happens During the Final Inspection?
The contractor should review the completed work.
Areas of attention may include:
- Visible shingle installation.
- Flashing details.
- Roof edges.
- Ridge caps.
- Ventilation components.
- Cleanup.
- Any remaining project concerns.
Homeowners should also ask for applicable warranty information and project documentation.
What Documents Should You Receive?
Depending on the contract and project, documents may include:
- Final invoice.
- Payment records.
- Workmanship warranty.
- Manufacturer warranty information.
- Applicable warranty registration confirmation.
- Permit or inspection records where required.
- Documentation of approved additional work.
Keep these records for future maintenance, warranty questions, and property transactions.
How Long Does the Entire Roof Replacement Process Take?
Many straightforward residential asphalt-shingle replacements can be completed in approximately one to three working days after installation begins.
However, the complete project timeline includes more than the physical installation.
Before Installation
Time may be required for:
- Inspection and evaluation.
- Estimate preparation.
- Material selection.
- Contract approval.
- Financing approval, if applicable.
- Permitting where required.
- Material ordering.
- Scheduling.
During Installation
The duration depends on:
- Roof size.
- Roof pitch.
- Number of existing layers.
- Roof design.
- Weather conditions.
- Decking repairs.
- Selected materials.
- Crew and equipment requirements.
After Installation
Final documentation, applicable inspections, and warranty registration may require additional administrative time.
The contractor should provide a project-specific schedule.
Can You Stay Home During Roof Replacement?
In many cases, yes.
Most homeowners can remain inside their houses during a standard residential roof replacement.
However, the work can be loud and may temporarily restrict access to certain outdoor areas.
What Should You Expect?
- Hammering and nail-gun noise.
- Workers moving across the roof.
- Equipment and delivery vehicles.
- Debris removal.
- Vibration from construction activity.
- Temporary restrictions around the home.
Should Children and Pets Stay Inside?
Children and pets should remain away from construction areas.
If your household includes anyone sensitive to noise, consider arranging alternative activities during installation.
Always follow the contractor's safety guidance.
What Happens If It Rains During Roof Replacement?
Rain is one of the most common concerns homeowners have about roof replacement.
A roofing contractor should evaluate weather conditions before beginning work and plan the project to reduce exposure.
However, weather conditions can change unexpectedly.
How Do Roofers Handle Rain?
Depending on the circumstances, the crew may:
- Delay the installation.
- Pause work.
- Secure materials.
- Protect exposed areas using appropriate temporary coverings.
- Resume work when conditions are suitable.
Temporary coverings can reduce exposure but are not equivalent to a completed roofing system.
Before work begins, ask how unexpected weather will be handled and whom to contact if concerns arise.
Roof Replacement in Greensboro, Winston-Salem, and High Point
The basic roof replacement process is similar across the Piedmont Triad, but local property conditions and jurisdictional requirements can affect the work.
Greensboro Roof Replacement
Greensboro homeowners may have roofing systems ranging from straightforward suburban designs to older homes with complex rooflines and existing flashing details.
Our Greensboro roofing services include roof inspections, repairs, replacements, and storm-damage roofing assessments.
Winston-Salem Roof Replacement
Winston-Salem has a mix of older residential properties and newer construction.
Depending on the property, roof replacement may involve evaluating existing decking, ventilation, or detailed roof intersections.
Learn more about our Winston-Salem roofing services.
High Point Roof Replacement
High Point homeowners may need roof replacement because of aging materials, storm damage, recurring leaks, or other roofing conditions.
The appropriate installation scope depends on the property's actual needs.
Explore our High Point roofing services for information about local inspections and replacement options.
Surrounding Piedmont Triad Communities
Homeowners in Kernersville, Jamestown, Summerfield, Oak Ridge, and nearby communities should also confirm applicable local requirements and the contractor's service coverage.
The roofing process should be tailored to the property rather than treated as identical for every home.
How Much Does Roof Replacement Cost?
Roof replacement cost depends on roof size, material selection, installation complexity, existing damage, and the scope of work.
For preliminary planning, some homeowners consider broad asphalt-shingle replacement budgets of approximately $8,000–$22,000, although individual projects can fall outside this range.
This is an illustrative budgeting range, not a verified local market average or a binding estimate.
For a more detailed explanation, read our 2026 North Carolina roof replacement cost guide.
The most accurate estimate comes from a professional assessment and written proposal.
What Should You Ask Your Roofing Contractor Before Installation?
Before signing a roof replacement contract, ask questions about the proposed work and project management.
Important questions include:
- What roofing materials will be installed?
- Will the existing roofing materials be removed?
- How will the roof decking be inspected?
- How are unexpected repairs handled?
- What underlayment and water-protection materials are included?
- Will flashing be replaced or reused where appropriate?
- What ventilation work is included?
- How long is installation expected to take?
- How will the property be protected?
- What happens if rain delays the project?
- What cleanup procedures are included?
- What warranties apply?
- Who supervises the project?
- Who should
Fill out our quick contact form to get a free estimate from one of our Roofers

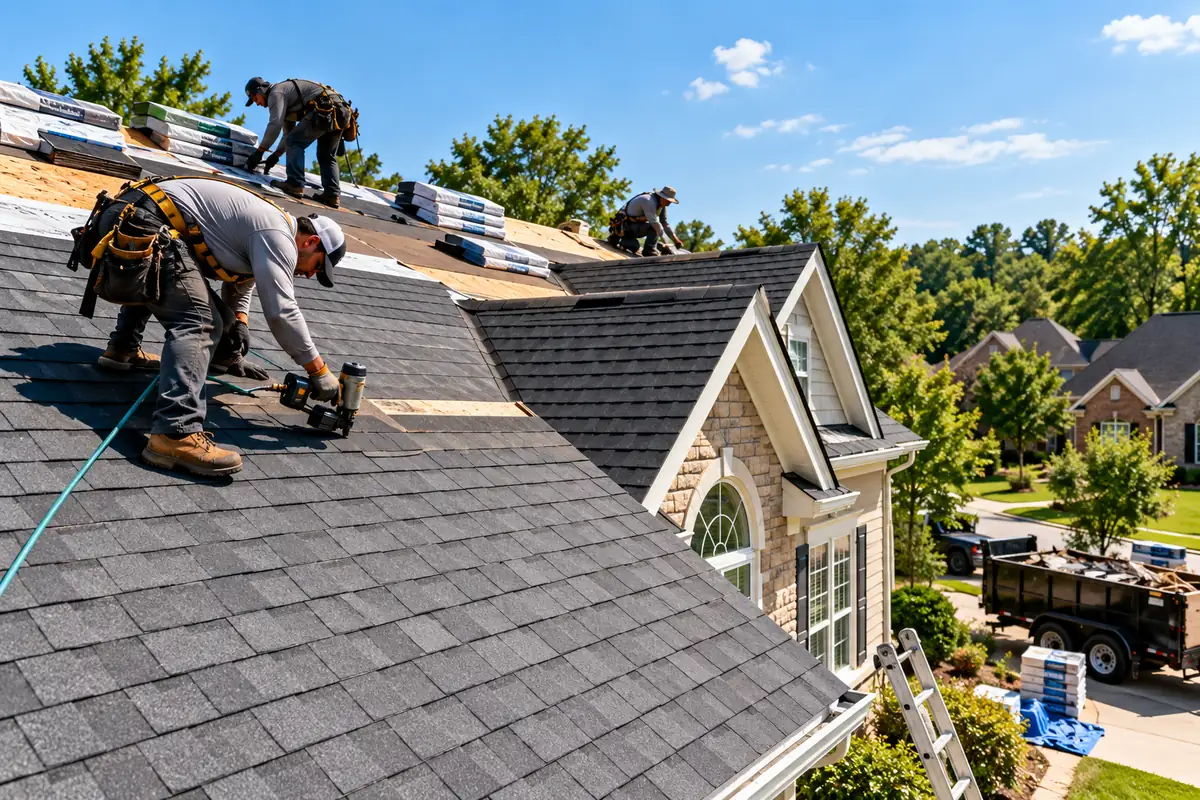
Contact us today for a free estimate, and let us show you why we're the preferred choice for homeowners and businesses alike. We're a family-owned local roofing company.
Top Roof Repair & Replacement Greensboro
Whether you're in need of a roof repair, full shingle roof replacement in Greensboro, or a completely new roof in Greensboro NC, our expert team is ready to deliver high-quality results with unmatched professionalism.We also specialize in insurance roof replacement in Greensboro, helping homeowners navigate the claims process after storm or hail damage with ease. If you've experienced wind or storm damage and need roof repair in Greensboro, we’re here to respond quickly and protect your home from further harm.Our services extend beyond traditional repairs to include metal roofing, commercial roofing, and complete residential roofing solutions — ensuring we have the right system for every customer and every roof type.

Metal Roofing
We specialize in installing GAF Timbersteel metal roofs: a stylish and energy efficient choice.

Roof Repair
We repair roof damage and roof leaks, execute roof replacements, and ensure that every square foot of your roof is in top condition.

Roof Replacement
Roof replacement is crucial not just for structural integrity but for a home's overall value.

Roof Inspection
We review both the interior and exterior components of the roof to identify potential issues.

Roof Rejuvenation
We methodically clean all roof types to improve curb appeal and avoid potential issues with this valuable preventative maintenance.

New Roof Installation
We take pride in installing cutting edge, long-lasting, and energy efficient roofs.